For those who don’t know, the Picture in Picture or PiP Mode basically changes the video configuration to fit into a small Window. Once enabled, it plays the video in a small controllable floating window. You can move and resize the floating window as per your desire to fit comfortably on the screen. The PiP mode even works when the main browser window is not active or minimized. If we talk about the Picture-in-Picture mode of Firefox, it’s relatively easy to enable the feature on the web browser. Just make sure that you are using the latest version of the Firefox web browser. Also Read: How to Enable Picture-in-Picture Mode On Google Chrome
Steps to Enable Picture-in-Picture mode in Mozilla Firefox Browser
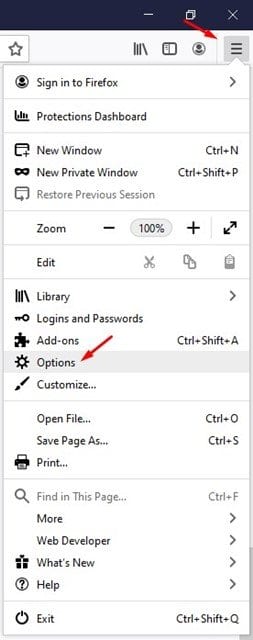
So, in this article, we will share a step-by-step guide on how to enable Picture in Picture mode in the Mozilla Firefox web browser. Let’s check out. Step 1. First of all, launch Mozilla Firefox on your Windows 10 computer. Step 2. Now, click on the three horizontal lines and select ‘Options’
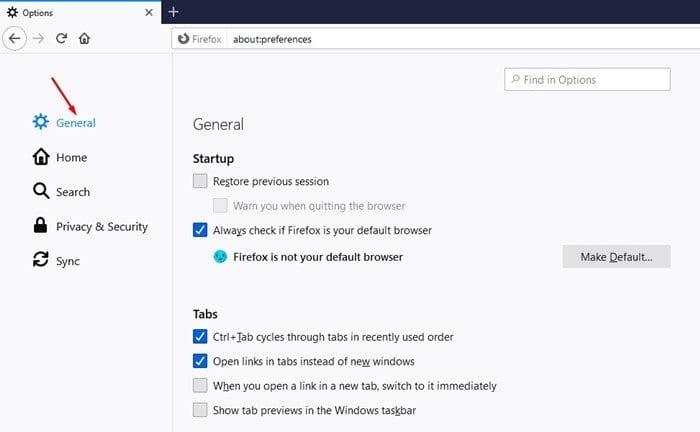
Step 3. On the Option, click on the ‘General’ tab.
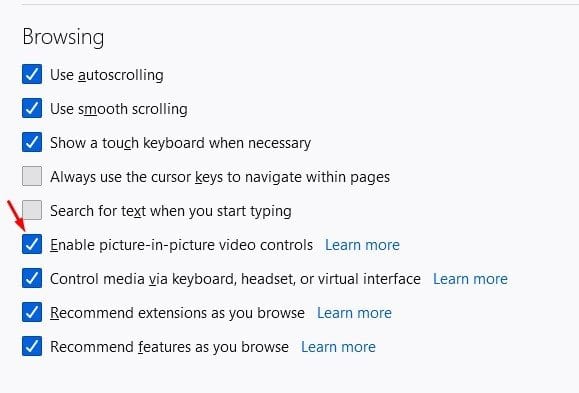
Step 4. Scroll to the ‘Browsing’ section and check the option ‘Enable picture-in-picture video controls.’
Step 5. Once done, restart the web browser to apply the changes. Step 6. After the restart, open a video website like YouTube and hover the mouse cursor over the video. You will see a PiP icon. Just click on it and the video will start to play in a small floating window.
Note: In a few sites, the Picture-in-Picture mode might not work. However, it will work on most of the famous websites like YouTube, Vimeo, etc. That’s it! You are done. This is how you can enable Picture-in-Picture mode in the Mozilla Firefox web browser. I hope this article helped you! Please share it with your friends also. If you have any doubts related to this, let us know in the comment box below.


