On your Android smartphone, you can change the screen resolution if the icons or the layout appears too short or big for you. There are third-party apps available for Android that lets you change the screen resolution, but most of them need root access.
Steps To Change Android’s Screen Resolution
If you don’t have a rooted device and don’t want to root it either, you need to use your computer to change your Android screen resolution. Below, we have shared a step-by-step guide on how to change screen resolution on Android. Let’s check out.
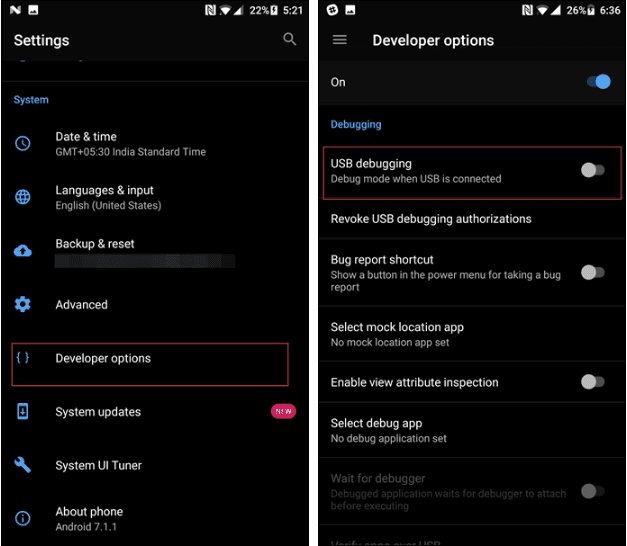
First, enable USB Debugging on your Android device. For that, head to Settings > About Page > Build Number. Now tap on Build Number 7 times.
Next, head to Settings > Developer Options > USB debugging. There you need to enable the USB Debugging mode.
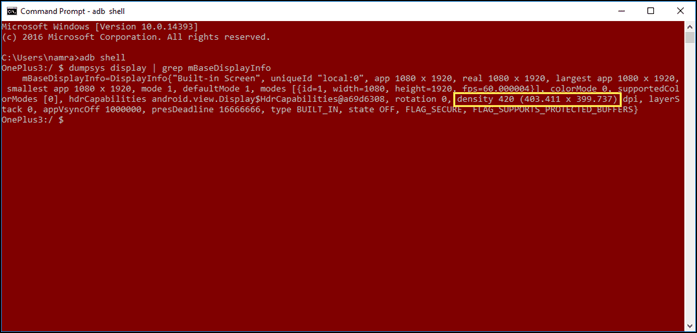
Now connect your Android device to your computer via a USB Cable and then open Command Prompt on your computer. There you need to enter the following command adb shell Wait for a few seconds and then enter the following command dumpsys display | grep mBaseDisplayInfo
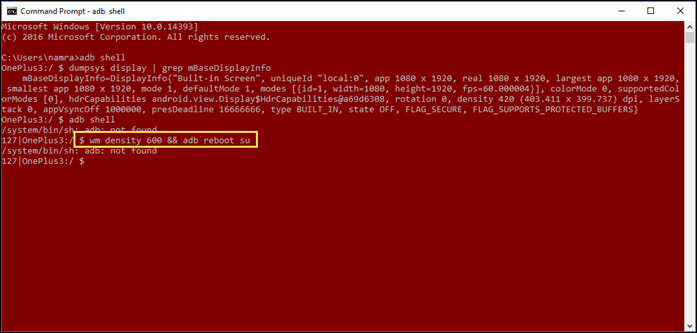
You need to look for the density value, as shown in the screenshot above. Note the existing DPI values, and then you need to replace them. 4. Android’s DPI values vary between 120 and 640. You need to choose the perfect DPI that will balance your phone size. You need to enter the below command in the command prompt and make sure to change the [DPI] with the values of your choice. wm density [DPI] && adb reboot
That’s it! You need to do this if you want to change your Android screen resolution. Your phone will reboot, and you will see a screen with a different resolution. So, this is the easiest method of changing the screen resolution of an Android smartphone. If you need more help changing Android’s screen resolution, let us know in the comments below.


