Also, Windows Security has a Firewall feature that blocks and allows connections depending on whether or not they are safe. The Windows Firewall works as a filter between your PC and the internet. Windows firewall is enabled by default, and unless you run into a problem, it works silently in the background. However, Windows Firewall might sometimes show you notifications asking you to allow a program to connect to the internet. This thing happens when any program tries to use the internet for the first time. So, in that case, you might need to whitelist the program in your Windows Firewall. So, if you are looking for ways to allow apps through Windows Firewall, you are reading the right guide. Also read: 10 Best PC Migration Software for Windows 10/11
Steps to Allow Apps Through Firewall on Windows 10
In this article, we will share a step-by-step guide on how to allow an app through Windows Firewall. Let’s check out.
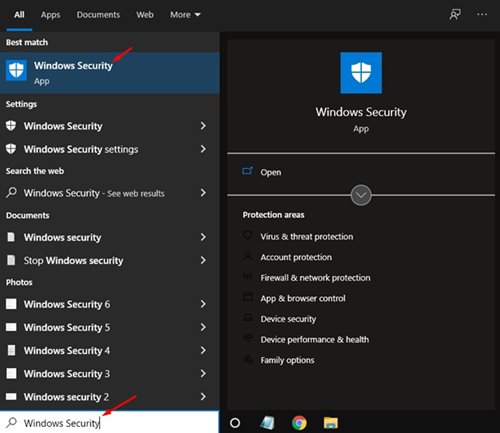
First of all, open the Windows 10 start menu and type in Windows Security. Open Windows Security from the list.
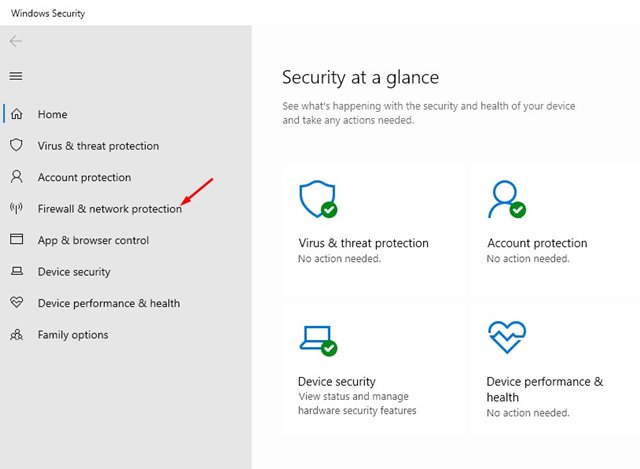
Now, on the Windows Security page, click on the Firewall & network Protection option.
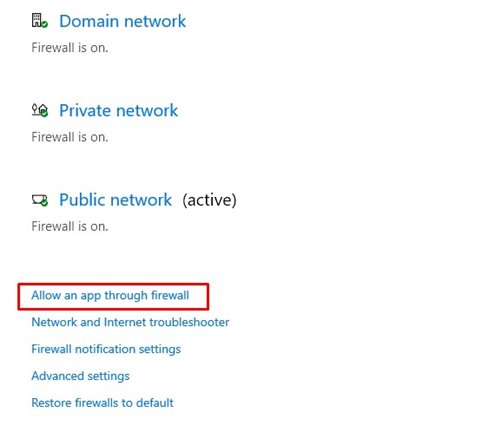
Now, click on the Allow an app through the firewall option on the right pane.
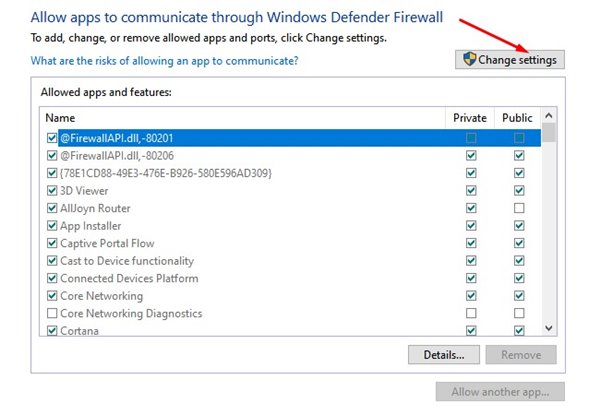
On the next page, click on the Change Settings button, as shown below.
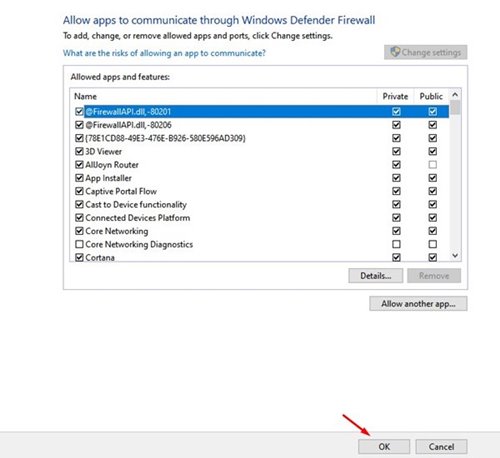
Now check the app or feature you want to allow through Windows Firewall. You will find two types of options here – Private & Public. The Private is meant for a home network, whereas Public is meant for public wifi.
Once done, click on the Ok button to save the changes.
That’s it! You are done. This is how you can allow an app through Firewall in Windows 10. So, this guide is all about how to allow apps through Firewall on Windows 10. I hope this article helped you! Please share it with your friends also. If you have any doubts related to this, let us know in the comment box below.
